Nginx – Summing up (Ubuntu 12.04 LTS)
This article is part of our Academy Course titled Introduction to Nginx.
This course will introduce you to the magic of nginx. You will learn to install and configure nginx for a variety of software platforms and how to integrate it with Apache. Additionally, you will get involved with more advanced concepts like Load Balancing, SSL configuration and Websockets proxying. Check it out here!
1. Introduction
In this last tutorial we will review some key important facts about Nginx that we have discussed in depth on the previous ones.
2. Installation
The reasons why we have chosen to download the source code of the program and compile it manually for our production server (as opposed to using installation perform through a package manager, such as aptitude or yum, which we have also covered) are:
- The package may not be available in the repositories that are available for your Linux distribution. Even if Nginx IS available in the repositories, most likely it will be an outdated version.
- Nginx provides a significant amount of additional compile time options (which define, modify, or enhance its behavior). Note that this might require the installation of some other tools and libraries.
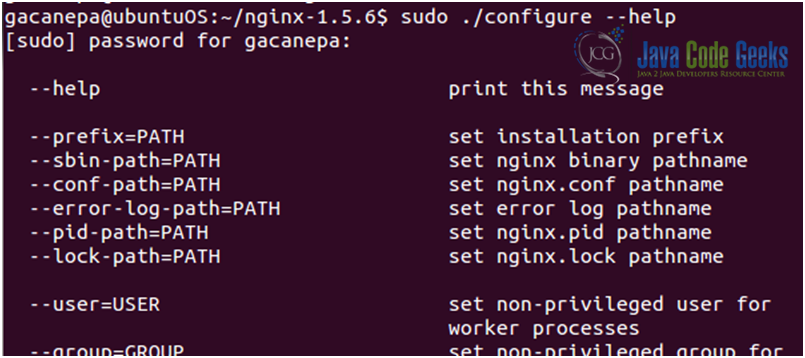
The compile time options (along with a brief description) can be displayed with:
sudo ./configure --help
Note that this command must be run in the directory where the source code was extracted (see Fig. 1). These compile time options can be classified under the following categories:
- Path options let us specify the directory or file paths for a variety of elements.
- Prerequisites options let us specify the path of prerequisites (libaries and binaries).
- Module options allow us to enable some modules that are not enabled by default or disable modules that are enable by default.
- Besides, there are some miscellaneous options available in the configuration script, for example, regarding the mail server feature or event management.
On occasions, the build process may fail due to missing prerequisites, unspecified or non-existent paths, or paths with wrong permissions (we need to make sure that the directory(ies) where we will install Nginx are writable).

3. Documentation and examples
The official website of the project does not provide a significant amount of information or documentation, other than links for downloading the latest versions. However, we can find a lot of interesting information, documentation and examples on the official wiki (see Fig. 2), which may prove very useful to us in many situations, and in the forums (see Fig. 3). Additionally, the Nginx mailing list, which is relayed on the Nginx forum, is an excellent resource for any question we may have; now, if we need direct assistance, there is always a bunch of regulars helping each other out on the IRC channel #Nginx on irc.freenode.net.


4. Troubleshooting
A small thing such as a typo in the main configuration file can cause us severe headaches. The first thing that we need to do after performing a change in the file nginx.conf is test it with the –t switch. Note that this command must be executed in the directory where the binary file is located (see Fig. 4). The output of this command will show whether the syntax of the configuration file is correct or the line and directive that needs to be corrected if it is not. Also, it is a good idea to keep an intact copy of your original nginx.conf while making changes in case of something unexpected happens.

- Check access permissions: When configuring the build with the configure command, you are allowed to specify a user and group that will be used by default. However, in the configuration file, the user directive allows you to specify a user and group. This directive overrides the value that you may have defined during the configure step. If Nginx is supposed to access files that do not have the correct permissions, or in other words, that cannot be read (and therefore cannot be written, i.e. directories that hold temporary files for example) by the specified user and group, Nginx will not be able to serve files correctly.
- Remember to reload the configuration file or restart the service after making changes.
sudo service nginx reload
or
sudo service nginx restart
We may want to prefer the first over the second as it preserves existing connections.
- Read the logs! There is usually no need to look for the answer to your problems on the Internet. Chances are the answer is already given to you by Nginx in the logfiles. There are two variations of log files you may want to check:
- the access log and
- the error log (this last log is VERY useful while debugging or troubleshooting an issue).
- Check the Wiki for documentation and working examples, and pay close attention to the Pitfalls1 section, which outlines common mistakes in configuration files.


